The Americans decided on securing the farm in the centre, Tempest standing on the defensive and Sheridan advancing to threaten the flank of any advance by the British centre. Tempest's moved his unit of riflemen into the wood on his left flank, from there they could fire on any British troops which advanced. Eccles' men moved forward in a rather disjointed way which resulted in one unlucky battalion becoming the target for the concentrated fire of three units of American infantry and their supporting artillery. The rating of British infantry does enable them to withstand fire better than the majority of the American units, but having to roll four times does test the rating rather. However, Lady Luck obviously smiled on Eccles as the unit came through unscathed. Now the British replied and soon two American militia units had been forced to fall back to rally. (Long range volleys are usually ineffective, so this result was down to some rather unlucky dice rolls by the American commander).
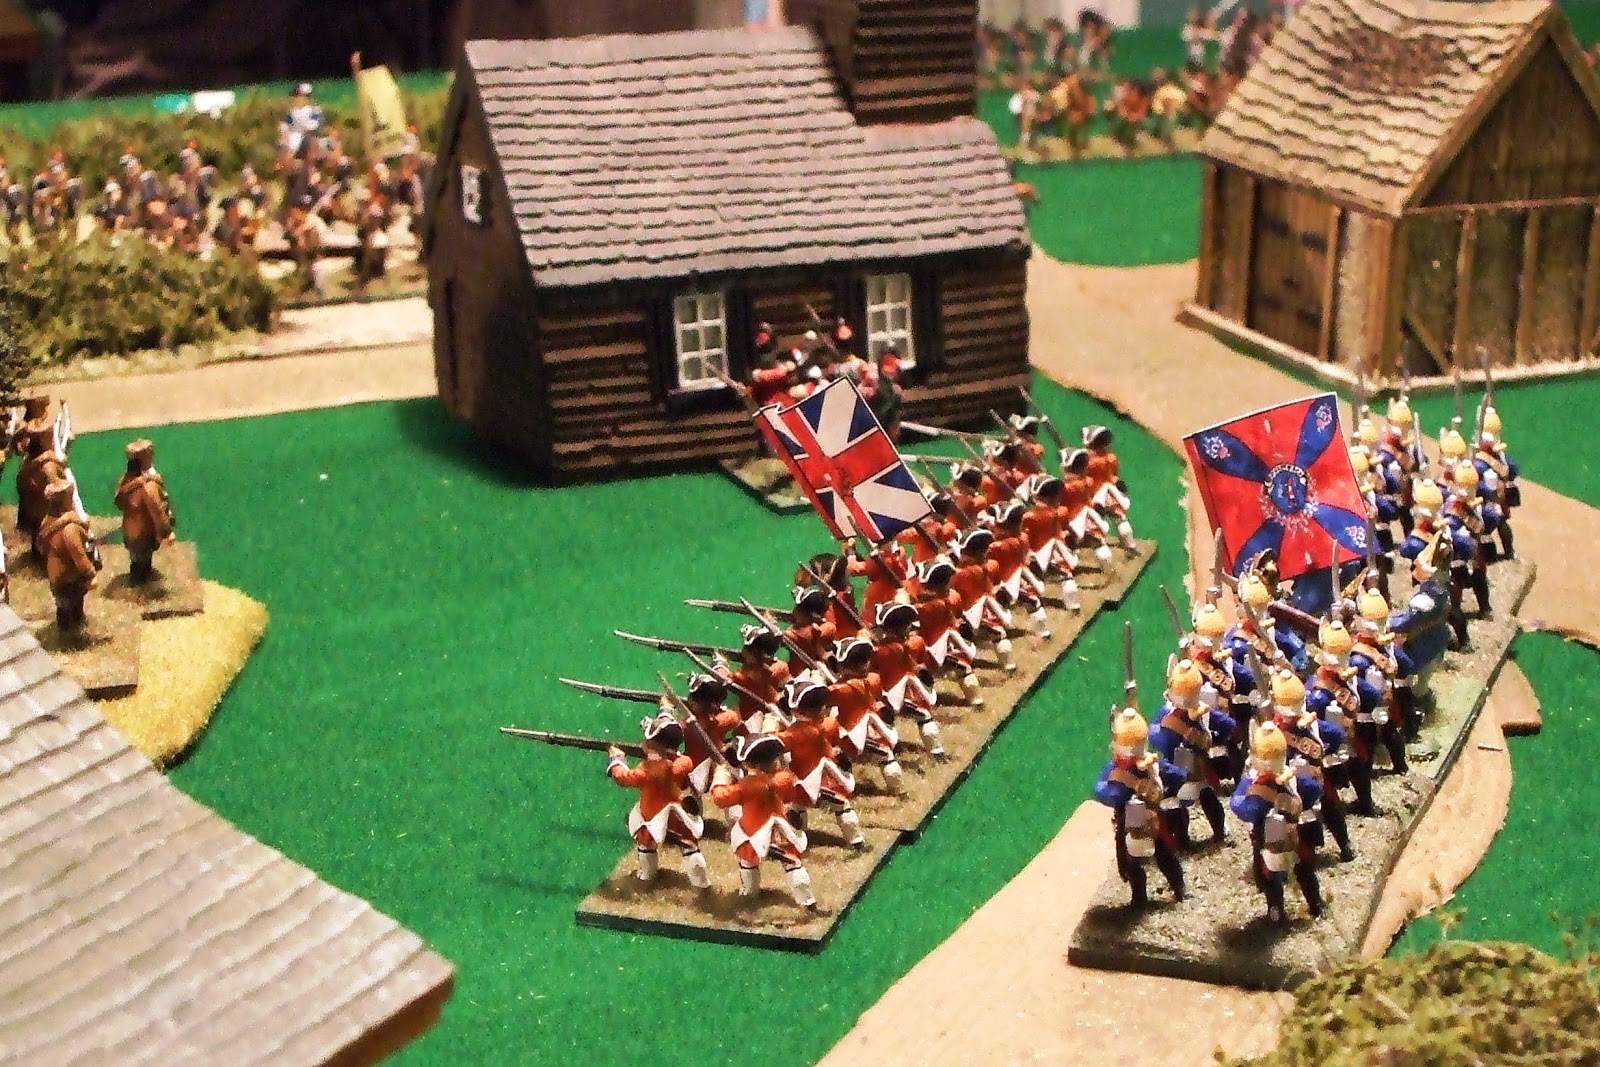
Moriarty was moving units forward to try and take control of Freeman's Farm. In this he was forestalled by Shore who managed to take the central building just before Moriarty's grenadiers arrived. A melee then took place as the grenadiers charged home. ( In P & L a melee can last for several phases as a deck of cards is used to discover what action takes place; eg Defensive fire, Attackers fire, Defenders check morale, resolve melee). After a short melee (the first card turned was 'resolve melee), the American defenders were ejected and the grenadiers took up residence. To their right a line battalion occupied the barn and these successes enabled Moriarty's second line , comprising two line battalions, to move to their left and move towards the American troops threatening the flank of the British advance.
On the British left Thynne had moved forward cautiously, delayed by finding an advantageous position for his artillery. Sheridan had moved a unit of French infantry forward, supported by his cavalry; but with the bulk of his infantry being militia he was keen to defend against Thynne and move those units he could to assist Shore's flanking manoeuvre. However, Sheridan's artillery did force Thynne's light infantry to fall back and this relieved a little of the pressure.

Eccles was finding it very difficult to make any headway beyond the crest of the ridge. His units were beginning to acquire damage markers from the American fire (units can have up to five markers, the fifth means the unit is removed from play), and although the American units were also suffering, he was outnumbered five to three. He sent his reserve battalion towards the wood to dislodge the riflemen who had forced his artillery crew to rally back. Seeing a steady line of bayonets advancing towards them the riflemen fell back, their hurried shots causing no damage to the British infantry.
In the centre volleys were exchanged between the grenadiers and Shore's elite light infantry unit. Neither was able to gain an advantage; the British volleys were restricted by occupying buildings and the Americans by the cover afforded by the buildings. Shore's flank attack was not going well. His riflemen had been unwilling to meet a charge by the British line battalion and when they fell back to rally they were caught by artillery fire from Thynne's command. Two supporting militia units were also forced to fall back to rally. The one continental unit standing its ground found itself outflanked and had to give ground.

Sheridan tried a cavalry charge to relieve the pressure. Thynne's men stood and fired a volley and also had the advantage of having a second unit in support. The infantry managed to withstand the first impact and following a positive morale check their supporting unit came forward to fight a second round of melee. This too was inconclusive and both sides fell back to recover. On the British move the infantry was able to fire a volley which further damaged the cavalry ,forcing them to rally back.
On the following move the infantry advanced and fired another volley at the French battalion which was also forced to rally back. At this stage there was a group of five American units trying to rally. Having two or three units already carrying three damage markers, the American commander decoded that it was time to fall back before the army disintegrated, so the day belonged to the British.

Overall we thought that these rules were the best of the three that we had tried. They allowed for different grades of troops, and, those ratings could be adjusted to accommodate specific scenarios. The bulk of the British troops were more likely to withstand enemy fire, but were not 'supermen'. Historical tactics by the American player; ie using his militia to fire at long range and then fall back behind his 'continental' infantry to act as supports, would be rewarded. The British would advance but would also tend to suffer some damage before they came to contact, levelling up the resulting melee. We liked the idea of the multiple phase melee and the variable number of actions available to each side (decided by a dice roll; again ratings could be modified for specific scenarios). In fact there were only two things which we thought we would alter; one I mentioned last week, adjusting the effectiveness of riflemen at long range. The second was the the difficult of turning a column around.
No comments:
Post a Comment